Ah, fondant. The very mention of this sugary substance can elicit cries of joy or shudders of dread, depending on who you’re talking to. As the owner of a custom cake shop here in San Jose, I’ve seen it all when it comes to fondant. Some bakers swear by it, while others refuse to go anywhere near the stuff.
But you know what they say – love it or hate it, you can’t escape it. Fondant has become an integral part of the modern cake decorating landscape, with its smooth, seamless finish and endless possibilities for creative expression. And if you’re anything like me, you’ve probably found yourself staring down a cake order that requires a flawless fondant application, wondering how on earth you’re going to pull it off.
Well, fear not, my fellow cake enthusiasts! In this comprehensive guide, I’m going to take you on a journey through the wonderful world of fondant. We’ll explore its history, unpack the different types, and dive deep into the techniques and best practices for working with this finicky – yet oh-so-rewarding – medium. By the time we’re done, you’ll be a fondant master, ready to take on any cake challenge that comes your way.
The Lowdown on Fondant
So, what exactly is fondant, and where did it come from? Fondant is a sugar-based paste that has been used in cake decorating for centuries, with origins dating back to the 1800s. The word “fondant” comes from the French verb “fondre,” meaning “to melt” – a nod to the smooth, velvety texture that sets it apart from other types of icing.
Traditionally, fondant was made by boiling sugar, corn syrup, and water until it reached the “soft ball” stage on a candy thermometer. This mixture would then be kneaded and worked until it achieved a smooth, pliable consistency. While this homemade version is still used by some bakers, the fondant you’ll find in most bakeries and cake supply stores these days is a pre-made, commercially produced variety that’s often enhanced with additional ingredients like glycerin or marshmallow, to improve its workability and shelf life.
One of the key benefits of fondant is its ability to create a seamless, flawless finish on cakes. Unlike buttercream or cream cheese frosting, which can be prone to visible seams and textures, fondant provides a sleek, polished look that’s perfect for intricate designs and detailed decorations. It also has a melt-in-your-mouth texture that many people find delightful, and it can be tinted to virtually any color, making it a versatile choice for themed cakes and special occasions.
However, fondant is not without its challenges. Working with this finicky substance can be a real test of a baker’s skills, as it requires a delicate touch and a keen understanding of temperature, humidity, and other environmental factors. Too much kneading can cause the fondant to become stiff and unworkable, while too little can result in a sticky, gooey mess. And let’s not forget the dreaded “sweating” phenomenon, where condensation can form on the surface of the fondant, ruining the smooth finish you worked so hard to achieve.
Types of Fondant
When it comes to fondant, there’s no one-size-fits-all solution. In fact, there are several different varieties, each with its own unique properties and best-suited applications. Here’s a quick rundown of the most common types of fondant:
| Type of Fondant | Characteristics | Best Uses |
|---|---|---|
| Rolled Fondant | – Firm, pliable texture – Easily rolled into thin sheets – Can be tinted and sculpted | – Covering cakes and cupcakes – Creating detailed decorations and figures |
| Poured Fondant | – Liquid, pourable consistency – Smooth, glossy finish – Easily tinted | – Glazing cakes and pastries – Filling cake layers |
| Gum Paste | – Dries to a hard, brittle consistency – Can be molded and shaped – Commonly used for intricate decorations | – Creating flowers, figures, and other delicate pieces – Adding texture and dimension to cakes |
| Marshmallow Fondant | – Soft, malleable texture – Slightly sweeter flavor – Easier to work with than traditional fondant | – Covering cakes and cupcakes – Making decorations and shapes |
When it comes to choosing the right fondant for your project, it’s important to consider factors like the desired texture, the complexity of your design, and the overall aesthetic you’re going for. Rolled fondant is the most common choice for cake covering, as its firm yet pliable nature makes it easy to work with and allows for a smooth, flawless finish. Poured fondant, on the other hand, is better suited for glazes and fillings, while gum paste is the go-to for delicate, intricate decorations.
Marshmallow fondant has gained popularity in recent years, as it tends to be more forgiving and easier to work with than traditional rolled fondant. This can be a great option for novice bakers or those looking to achieve a more homemade, rustic look on their cakes.
Ultimately, the type of fondant you choose will depend on your specific needs and the vision you have for your cake. Don’t be afraid to experiment and find the one that works best for you!
Mastering the Fondant Fundamentals
Now that we’ve got the basics down, it’s time to dive into the nitty-gritty of fondant preparation and application. This is where the real magic happens, my friends, so listen up!
One of the most crucial steps in working with fondant is properly conditioning it. You see, fondant can be a bit of a diva – it’s highly sensitive to temperature and humidity, and if it’s not treated just right, it can quickly become a sticky, unworkable mess.
The key to conditioning fondant is to knead it thoroughly, either by hand or with a stand mixer, until it develops a smooth, pliable consistency. This helps to evenly distribute the moisture and sugars throughout the mixture, ensuring that it holds its shape and doesn’t become too soft or stiff.
As you knead, you’ll want to pay close attention to the fondant’s texture and make any necessary adjustments. If it’s feeling a bit dry and crumbly, you can try adding a few drops of water or glycerin to help soften it up. Conversely, if it’s too sticky and difficult to work with, a light dusting of powdered sugar or cornstarch can help to absorb excess moisture.
Once your fondant is properly conditioned, the real fun begins – it’s time to cover that cake! This is where your patience and precision will really be put to the test, as you’ll need to carefully drape and smooth the fondant over your cake, taking care to eliminate any air bubbles or wrinkles.
I like to start by rolling the fondant out into a large, thin sheet, then carefully lifting it up and draping it over the top of the cake. From there, I use my hands and a fondant smoother to gently press and smooth the fondant, working from the top down and around the sides. It’s a delicate dance, to be sure, but with a little practice, you’ll be able to achieve a perfectly smooth, flawless finish.
Of course, the work doesn’t stop there. Once your cake is covered, you’ll need to trim away any excess fondant and create crisp, clean edges. This is where a sharp knife and a steady hand come in handy. I like to use a fondant smoother or a ruler to help guide my cuts, ensuring that everything is perfectly straight and aligned.
And let’s not forget about the all-important seam! This is the line where the fondant sheets come together, and it can make or break the overall look of your cake. To minimize the appearance of the seam, I recommend using a tiny bit of water or edible glue to help “glue” the edges together, then smoothing them out with a fondant smoother.
Phew, it’s a lot to take in, I know. But trust me, once you get the hang of it, working with fondant can be an absolute joy. It’s like a zen meditation, where the only sounds are the gentle hum of your mixer and the satisfying “thwack” of your fondant smoother. Just make sure to keep a roll of paper towels on hand – you’re gonna need them to wipe away those happy tears of accomplishment!
Decorating with Fondant: Unleash Your Creativity
Alright, now that we’ve got the basics of fondant application down, it’s time to talk about the really fun stuff – decorating! This is where you can truly let your creativity shine and transform a simple cake into a true work of art.
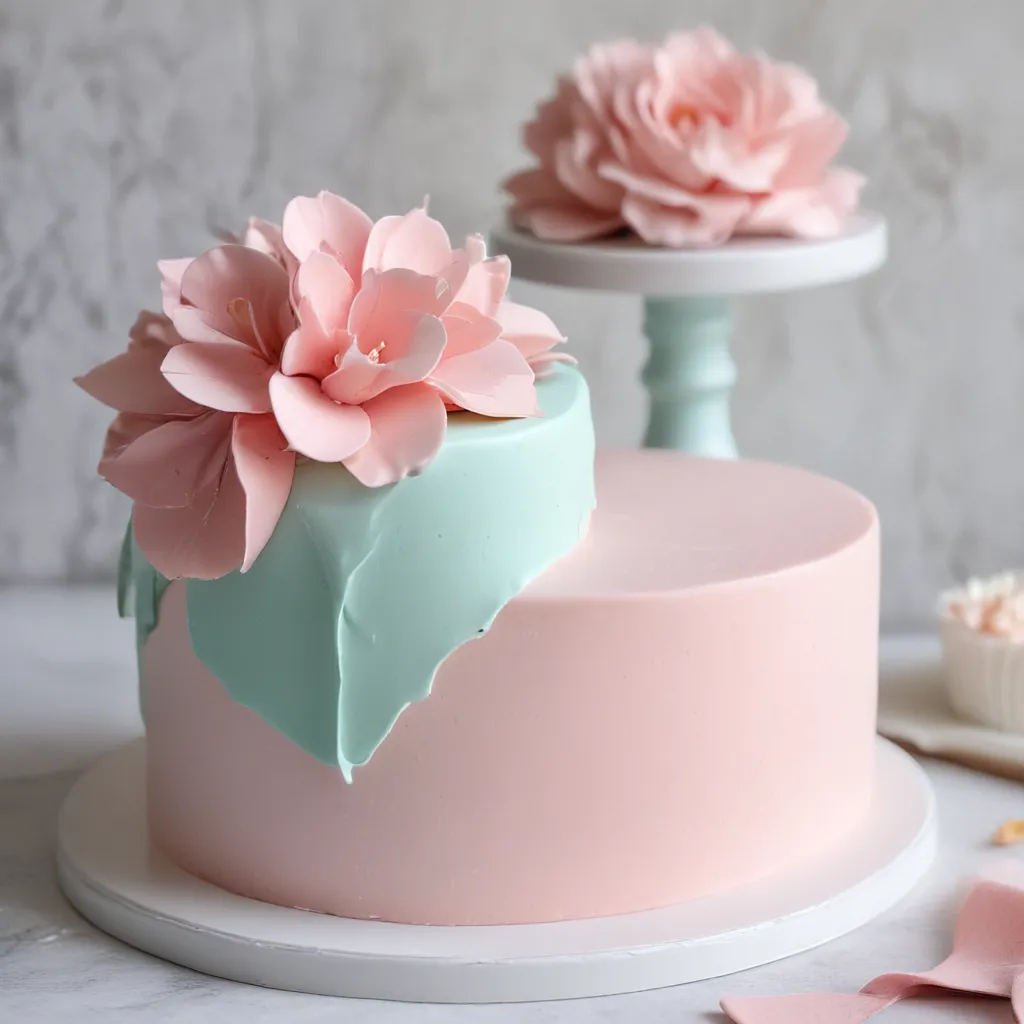
One of the most popular fondant decorations is, of course, the fondant flower. These delicate, lifelike blooms can add a touch of elegance and sophistication to any cake, and they’re surprisingly easy to make with a little practice. Simply roll out thin sheets of fondant, cut out the desired shapes, and then use a variety of tools (like veining tools, dresden tools, and even toothpicks) to add texture and dimension.
Pro tip: To achieve the most realistic look, I like to start with a base of gum paste, which dries to a hard, sturdy consistency, then layer on fondant petals for a softer, more natural appearance.
But flowers aren’t the only way to unleash your fondant creativity. You can use this versatile medium to create all sorts of three-dimensional decorations, from fondant figurines and toppers to intricate patterns and designs. The possibilities are truly endless!
One of my personal favorite fondant creations is a whimsical, hand-painted cake that I did for a client’s birthday. I started with a smooth, fondant-covered cake, then used food-safe paints and a steady hand to bring to life a vibrant, storybook-inspired scene, complete with a castle, a flying dragon, and a princess in a flowing gown. The client was absolutely thrilled with the result, and I have to say, I had a blast bringing that magical vision to life.
Of course, fondant decorations aren’t just for show – they can also be completely edible! One of the coolest trends I’ve seen in the cake decorating world is the use of fondant to create lifelike, 3D replicas of everyday objects, from books and cameras to cell phones and coffee mugs. These hyper-realistic creations not only look incredible, but they’re also a delicious surprise for the lucky recipients.
And let’s not forget about the classic fondant technique of modeling. With a little bit of practice, you can use fondant to sculpt intricate, three-dimensional figures and shapes, from cute animals to whimsical cartoon characters. It’s like working with clay, but with the added bonus of being able to eat your masterpiece when you’re done!
Ultimately, the key to successful fondant decorating is to let your imagination run wild. Don’t be afraid to experiment, try new techniques, and push the boundaries of what you think is possible. After all, that’s where the true magic happens – when you’re willing to step outside your comfort zone and discover new and unexpected ways to bring your creative vision to life.
So, what are you waiting for? Grab a block of fondant, channel your inner artist, and get to work! Who knows, maybe your next creation will be the talk of the town (or at least your local cake-loving community).
Tips and Tricks for Fondant Success
Now, I know what you’re thinking – all of this fondant talk is great, but how do I actually make it work for me? Well, my friend, I’ve got you covered. Here are my top tips and tricks for fondant success:
Tip #1: Temperature is key. Fondant is incredibly sensitive to changes in temperature and humidity, so it’s crucial to keep an eye on the conditions in your workspace. Aim for a cool, dry environment, and consider using a dehumidifier or air conditioner if needed. And never, ever try to work with fondant in a warm, humid kitchen – it’s a recipe for disaster!
Tip #2: Invest in the right tools. Sure, you can technically use your hands to work with fondant, but trust me, having the right tools makes all the difference. A good fondant smoother, rolling pin, and set of cutters and modeling tools can take your cake decorating game to the next level. And don’t forget about that all-important turntable – it’ll be your best friend when it comes to achieving a perfectly smooth, even finish.
Tip #3: Practice, practice, practice. Like any skill, working with fondant takes time and patience to master. Don’t get discouraged if your first few attempts don’t turn out exactly as you’d hoped. Keep practicing, experiment with different techniques, and don’t be afraid to make mistakes – they’re all part of the learning process.
Tip #4: Don’t be afraid to get creative. Fondant may be finicky, but it’s also incredibly versatile. Don’t be afraid to step outside the box and try new things, whether it’s experimenting with different color combinations or incorporating unexpected textures and patterns. After all, the best cakes are the ones that reflect your unique style and personality.
Tip #5: Embrace the imperfections. Let’s be real – even the most seasoned fondant experts can’t achieve absolute perfection every single time. And you know what? That’s okay! In fact, I’d argue that a little bit of imperfection can actually add to the charm and character of a cake. So don’t stress too much about those minor flaws – embrace them, and remember that your creation is still a work of art, no matter what.
Tip #6: Have fun with it! At the end of the day, working with fondant should be a joy, not a chore. So, put on your favorite playlist, pour yourself a cup of coffee (or a glass of wine, if that’s more your style), and let your creativity flow. Enjoy the process, celebrate your successes, and don’t be afraid to laugh at your mistakes – after all, that’s half the fun!
So there you have it, my fellow fondant enthusiasts – everything you need to know to conquer this sugary medium and turn your cakes into true masterpieces. Now, what are you waiting for? Grab your rolling pin and get to work! I can’t wait to see what you create.


